Hello img2track users! Welcome to my GIMP Q&A page. Many of you have requested help with using graphics software to optimize your images for knitting.
I will continue to add to this document, so check back for updates.
All information provided here is based on my own experience using GIMP with Mac OS. If you use another operating system, you may find differences in appearance and behavior of the program from my descriptions. Also, any information I present here is only one way of using the program, not the only way and perhaps not even the right way.
“How can I remove a few undesirable black pixels from my image?”
First of all, to make sure that these undesirable pixels don’t show up when you select your image with img2track, you want to work with either a pattern image that img2track has already created, or else make sure that your image is scaled to the exact width that you will be knitting. Otherwise img2track will resize and re-dither the image and you may end up right back in the same situation, with pixels where you don’t want them.
There are at least a couple of ways to remove black pixels from your image. Find tools by either clicking on Tools in the menu bar and choosing Pencil (N) or Eraser (Shift+E), or you can call up your tool box, Windows>New Tool Box or Command+B, and click on the pencil or eraser icon.
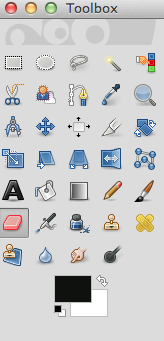
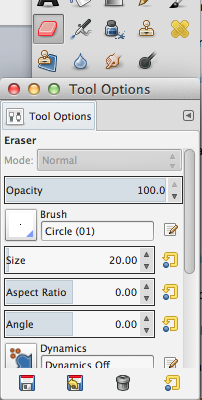
If you double-click the icon in the tool box you’ll get a tool options window where you can change the size of the tool. Experiment with sizes – what you need will vary with the task. If you are working in a tight area you might need it down to 1 pixel. If you’re working in a vast expanse of white with a few stray pixels you can save yourself a little time and effort by making it bigger, say 10 pixels.
If you use the pencil, be sure that you have your foreground color set to white. There should be 2 overlapping squares at the bottom of your tool box, the one on top is the foreground, the back one is the background, and you can swap them back and forth using the little arrow symbol next to the color palette squares.
If you use the eraser, you want the opposite, since your not adding white, but rather taking away foreground color (black) and leaving background color (white), so you would want the top square black and the bottom one white.